
How to Make a Vision Board: Physical or Digital, Step by Step
To make a vision board, choose a small number of goals for the year, collect images and words that stand for each one, arrange them on a board or a single digital page, and put it where you will see it every day. Then write a next action for each goal. A vision board is a reminder, not a method: looking at it will not make anything happen, but it can keep your goals in front of you while you do the work.
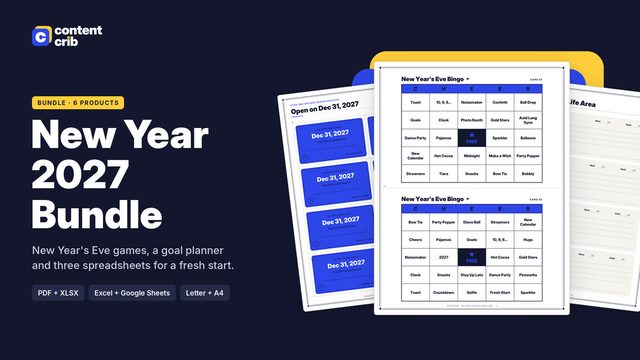 The template for thisNew Year 2027 Bundle $8.40 · 30% off→
What a vision board can and cannot do
It helps to be honest about this before you start cutting up magazines.
- It can make you decide what you want, keep those choices visible, and act as a daily prompt.
- It cannot replace a plan. Research on visualization points the same way. In a 1999 study by Pham and Taylor, summarized by PsyBlog, students who pictured the steps of studying spent more time studying and got better grades than students who only pictured a good result. The students who pictured only the outcome studied less.
So build a board that shows the work as well as the result, and pair it with written actions. The rest of this guide is set up that way.
Step 1: Choose your goals first
Do not start with pictures. Start with a short list. A board with thirty unrelated images is wallpaper; a board with five clear goals is a tool.
- List the areas of your life. For example: health, money, work, home, relationships, learning, fun and rest.
- Write one thing you want in each area by the end of the year. Keep it concrete: "run a 5K" instead of "get fit".
- Circle four to six. These go on the board. The others can wait.
- Add one word or phrase for the year if you like having a theme.
Step 2: Choose images that mean something specific
For each goal, look for two kinds of image.
- The result. The finished room, the race finish line, the city you want to visit, the number in the savings account.
- The process. Running shoes by the door, a desk set up for study, a meal you plan to cook, a calendar with workout days marked. This is the part most boards leave out.
Good sources: your own photos, magazines, catalogs, travel brochures, free stock photo sites, and words you write or print yourself. Your own photos work especially well because they show your real life instead of someone else's.
Skip images that only show a price tag or another person's body or house. If you cannot say what you would do this month because of an image, leave it off.
Step 3: Build a physical board
You need: a backing (poster board, cork board, foam board or a large sheet of card), scissors, glue stick or pins, a marker, and your images.
- Lay everything out before gluing. Move pieces around until it reads clearly.
- Group by goal. Give each goal its own zone so the board is easy to read at a glance.
- Put the most important goal in the center or the top left, where your eye lands first.
- Add words. Label each zone with the goal in plain language and a date if it has one.
- Leave some empty space. You will want to add to it during the year.
- Fix it down. Glue for a finished piece, or pins on cork if you want to change it later.
Step 4: Or build a digital board
A digital board is faster, easy to update, and can live on your phone. Any tool that lets you place images on a page will do: a slide program, a free design app, a notes app or a photo collage tool.
- Set the page size to match where it will live. Use your phone screen size for a lock screen, your monitor size for a desktop background, or US Letter or A4 if you plan to print it.
- Make a simple grid. Six boxes is plenty: one per goal.
- Drop one or two images in each box and type the goal underneath.
- Export it as an image and set it as your wallpaper, or print it.
Use only images you have the right to use if you plan to share the board publicly. For a private wallpaper this matters much less.
Physical or digital: which is better?
| Physical board | Digital board | |
|---|---|---|
| Time to make | An afternoon | Under an hour |
| Easy to update | Only with pins | Yes |
| Where you see it | One room | Phone, laptop, or printed |
| Best if you | Like making things by hand | Want it with you all day |
Neither is more effective on its own. Pick the one you will finish and actually look at.
Step 5: Put it where you will see it
- Next to your desk or planner, where you decide how to spend your day.
- Inside a closet door or by the bathroom mirror if you want it private.
- Phone lock screen for a digital board.
- Inside your planner. A small board on one page travels with your weekly plan.
Avoid places you walk past without stopping. After a couple of weeks you stop seeing anything that hangs in a hallway.
Step 6: Pair it with an action plan
This is the step that makes the board useful. For every goal on the board, write three things.
- The first action. Small enough to do this week.
- The likely obstacle. Psychologist Gabriele Oettingen's work on mental contrasting has people picture the future they want and then the reality standing in the way. In her studies, people who did both made more plans than people who only pictured the positive future.
- An if-then plan. "If it is 7 a.m. on Monday, Wednesday or Friday, then I put on my shoes and run." A review by Gollwitzer and Sheeran covering 94 studies and more than 8,000 participants found that if-then plans had a medium-to-large effect on reaching goals, beyond simply intending to.
The 2026 Year in Review and 2027 Goal Planner is built around this pairing. It has a 2027 vision page with a 6-box vision board, a goals page for 8 life areas, and 6 goal breakdown pages with space for your why, Q1 to Q4 milestones, first actions, obstacles and plan. The monthly pages then carry a top 3 goals list and a habit tracker, so the board connects to what you do each week.
Keep it alive during the year
- Monthly: look at each goal and write the next action.
- Quarterly: remove anything you no longer want. Dropping a goal on purpose is fine.
- When you finish a goal: mark it done on the board. A visible tick is satisfying and makes room for the next one.
Frequently asked questions
Do vision boards actually work?
Not by themselves. There is no good evidence that looking at pictures of what you want makes it happen, and research suggests that picturing only the outcome can reduce effort. A board is useful as a reminder when it sits next to a written plan you act on.
How many goals should go on a vision board?
Four to six is a workable number for one year. Fewer goals means each one gets real attention and the board stays readable.
When is the best time to make one?
Any time you are setting goals. Late December and early January are popular because the year is turning, but a board made in March works just as well.
Can kids make a vision board?
Yes. Keep it to three or four things they want to learn, try or do this year, and include one picture of the practice it will take. It makes a good New Year's Day activity.
Sources
- PsyBlog, "Visualisation: How To Avoid The Planning Fallacy", summarizing Pham and Taylor (1999) (2023)
- Peter M. Gollwitzer and Gabriele Oettingen, "Planning Promotes Goal Striving", book chapter citing Gollwitzer and Sheeran (2006) and Oettingen and colleagues (2001) (about 2011)
Skip the blank page
The New Year 2027 Bundle includes the 2027 Goal Planner, laid out and ready to use. $8.40, instant download.
Get the New Year 2027 BundleRelated guides
- New Year's Eve Party Games for 2027: Ideas for Adults, Families and Kids
- Year in Review Questions: 40 Reflection Prompts for 2026 and How to Set 2027 Goals
- New Year's Eve Ideas for Families With Kids: Games and Countdowns
- Thanksgiving Games for Family: 12 Ideas for Adults and Kids at the Table
- How to Play Thanksgiving Bingo: Rules, Calling Tips and Prize Ideas